Invoice creation in Service Shark can be done in two ways based on the settings you adjusted in the Invoice Settings page. For the invoice from scratch (in other words without template) follow the rules below:
Step 1. Open the job
- Click on the Jobs menu (hammer & wrench icons) on the bottom of your screen.
- Find the job you want to create invoice for from the list and click on it.
Step 2. Switch to Invoice tab
- Switch to the Invoice tab from the Booking.
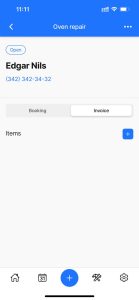
- Click on the blue plus button on the right side of the tab to add an item.
- You will see the Add new item window opened.
Step 3. Enter the item details
- Write down the name of the line item (this may be a service or material) into the Name in order to show on the invoice.
- Enter the quantity of the line item to the Qty field.
- Enter the unit price of the line item to the Rate field.
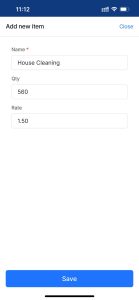
Step 4. Save the data filled
- Hit the Save button and you’ll have the first item added to your invoice.
- Continue doing so until all line items have been added to the invoice.
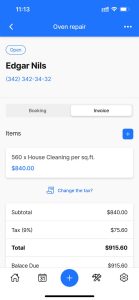
Step 5. Review the invoice total
- After you’ve completed the invoice you will see subtotal, tax rate, total and balance of the invoice below line items.
- Note that the tax is brought from the default tax rate you added in the Settings.
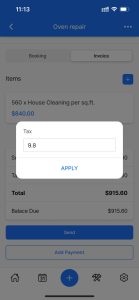
- If you want to adjust the tax rate click on the Change the tax button and enter the adjusted rate to the window opened.
The abovementioned invoice creation method applies for the cases if you haven’t activated the invoice template in the Settings menu. In case of the invoice template activation, you will have the line items created in the Settings inserted automatically to the invoice.